Wednesday, December 15, 2010

December Daily...December 12th and 13th

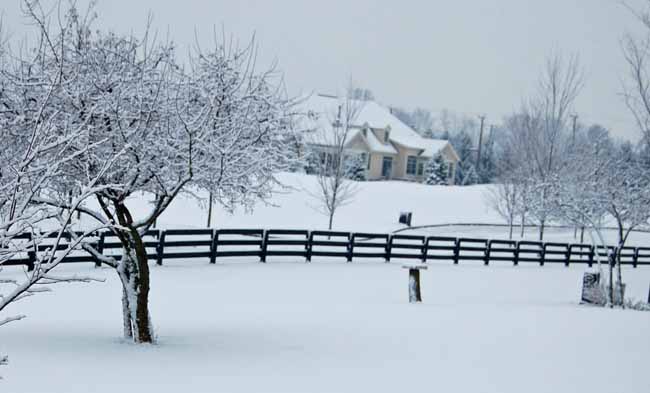
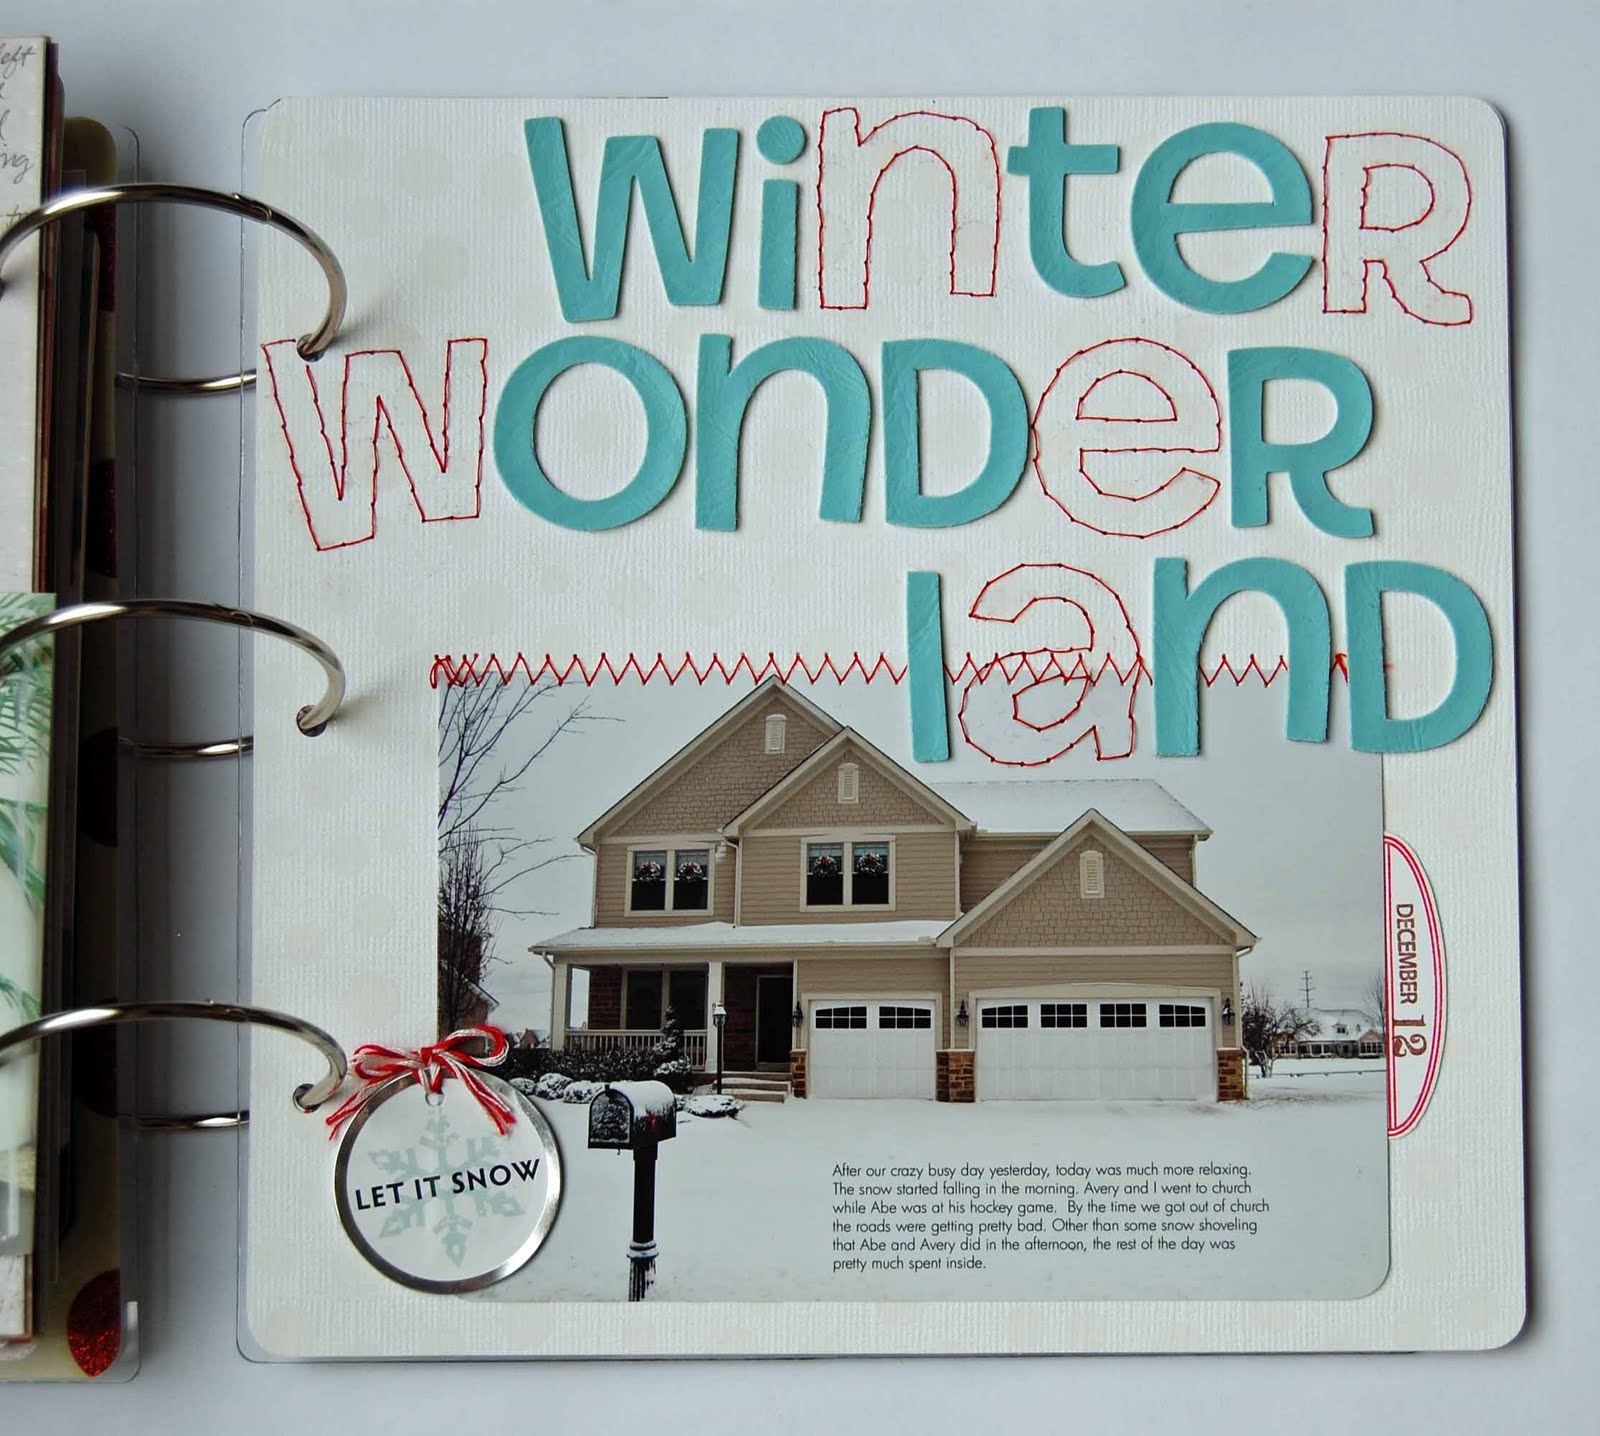
For the 12th, since we didn't do a whole lot, and since we got our first real snowfall of the season, I thought I'd do a page with a picture of the outside of our house. The picture above is the photo I used on the page, with journaling.

And here's what the page looks like. I used the same paper that I used on the front cover of my album, though you can't tell in this picture that it has the tone-on-tone white polka dots. I rounded the corners of the page as well as the bottom two corners of the picture, then stitched the picture with zig-zag stitching. For the title I used Thickers, and for some of the letters I just traced the thickers and hand-stitched the letter, just to change it up a little bit.
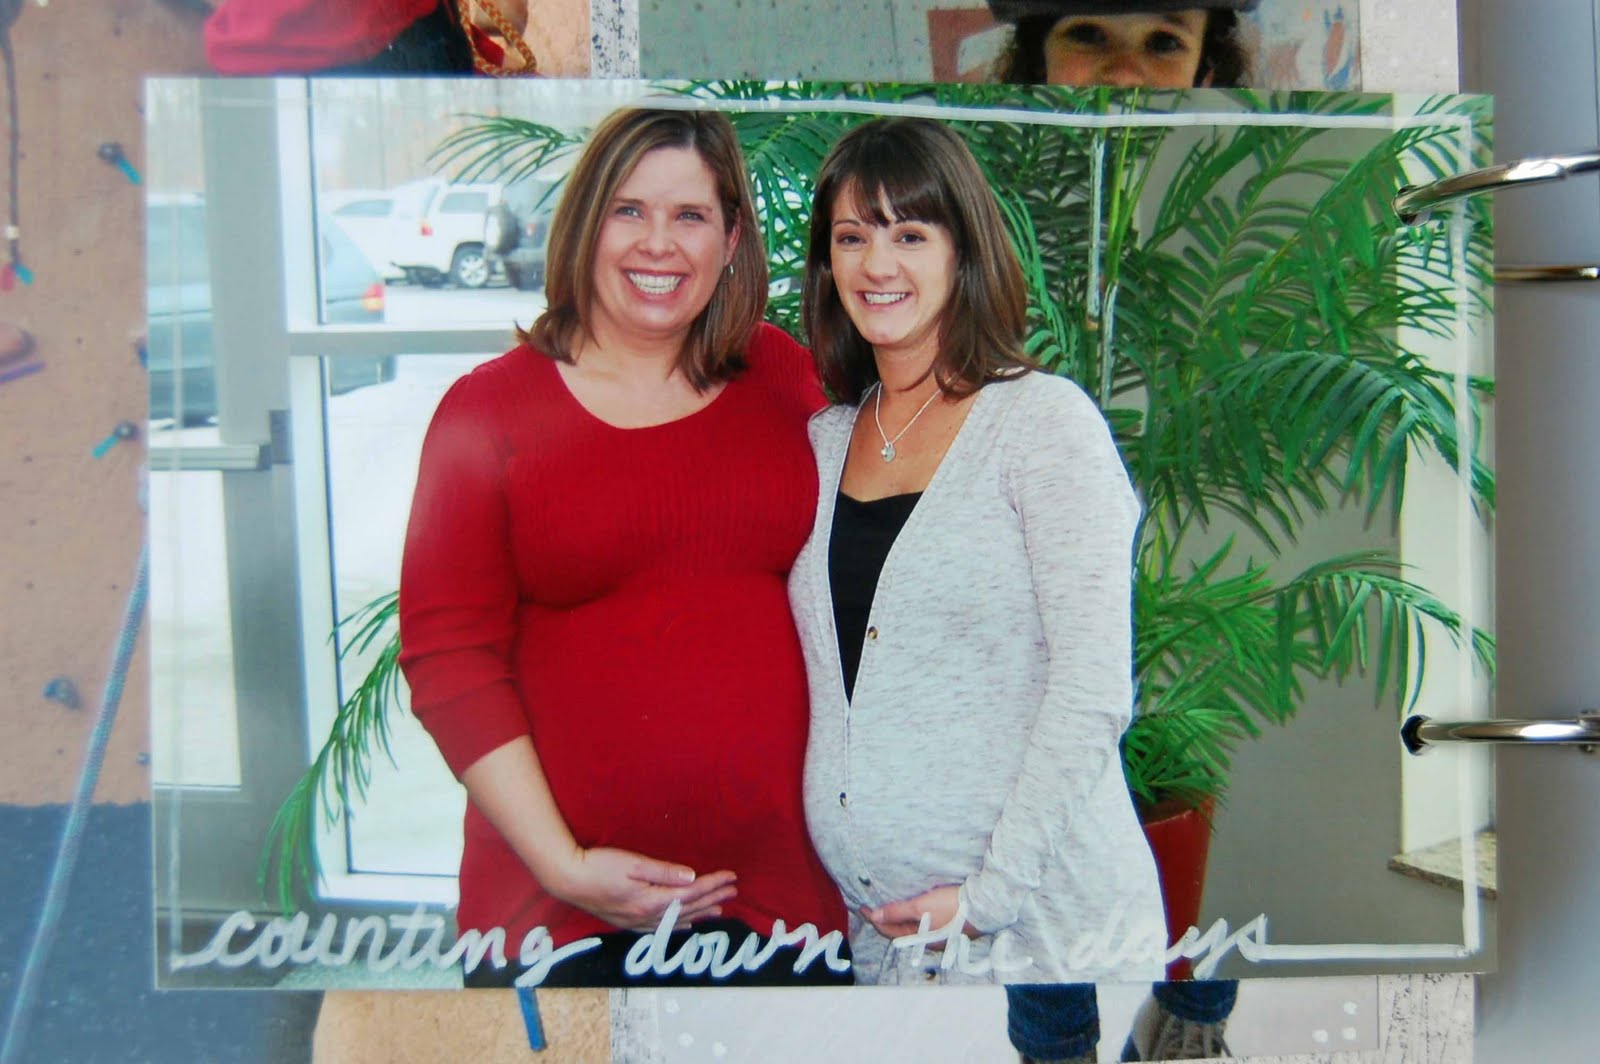
For the 13th, I didn't use a photo. The day for me was all about my doctor's appointment and finding out whether or not we'd be having our baby later this week. I was disappointed to find out that the answer is no, we will not be induced since I'm not dilated enough yet. It's the right decision, not to do the induction and to wait until my body and the baby are ready, but I was sure hoping to get a different answer that day! I had a little pity party for myself on the drive home from my appointment, and then I got over it and am now content to wait it out and see when this little guy is ready to join us on his own :)

The paper I used as my background came from the Holiday with Matthew Mead magazine (some really pretty photos in there, I have a few others in mind to try to include in the album as well). I cut the tag out using my Cricut and stitched it on with red thread, then stamped the number 13 before writing out the journaling. Here's a closeup of that:


And that's it. A simple page, but I didn't feel like it needed too much with all that was going on in the background.

Tuesday, December 14, 2010

December Daily...December 11th

December 11th for us was a very busy day, so I have lots of pages in my album for that day. We went to a Breakfast with Santa with some friends, so the first page is Avery's picture with Santa. I couldn't believe she actually sat on his lap...never thought that would happen. For this page I printed a 6x8 photo, and then used a scallop border punch on the edge. I attached the photo to the red polka dot patterned paper with zig zag stitching. On the photo I added my journaling in Photoshop (using the 20% opacity text box that Ali Edwards had a tutorial about on her website). I also added in some of the Christmas Cut-ups from Katie Pertiet (which I got from Designer Digitals last year).

Here's a closeup of the journaling. You can also see the felt present that I added with the number 11 on it. I also attached a safety pin (from Tim Holtz).
On the back of this page is an 8x8 photo of Avery rock climbing, which the kids started doing after their visit with Santa (the Breakfast with Santa took place at a Fitness Center). Sorry about the glare on the photo.

Here's a better look at the left side page:

And the right side:

On the back I did some hand journaling and added a photo of Avery ice skating that Abe had taken with his I-phone.
Then I had just a few more photos that I wanted to include, so I just attached two 4x6 photos back to back and punched holes for the rings. I added a border on both photos with white pen. Here's a rare photo of the three of us (we never seem to be able to get a good photo of our family, so I'm glad we were able to get this one).

And then here are the two preggos, ready to pop! Holly's due in January, and I have just about a week and a half left until my due date. Every time we've gotten together (and had our cameras available) during our pregnancy we've been sure to take a picture of our growing bellies. I'm pretty sure this is the last photo we'll get to take before I give birth, but maybe not! Who knows how long I'll go and if we might get together again before then...

Phew! That's a lot for just one day. I'm working on days 12 and 13 now. Hope to have them up tomorrow.

Saturday, December 11, 2010

December Daily...December 9th and 10th

Here we are at Day 9. By this point I'm starting to lose a little bit of my mojo. It's definitely difficult to keep this up every day, but I'm determined to do it, and I do like how the album is coming together so far.

On the 9th, I hadn't taken a picture all day, and by the time I was finished making the cinnamon rolls that I decided to bake, it was after dinner and dark outside. So by the time I finally decided to actually take any pictures, it meant that I had no daylight left for a nice photo. Since I absolutely hate the way my pictures look indoors with the flash on, I decided to just use the pics without the flash. They're not great either...they have that yellowy look to them and are slightly blurred. I really need to learn more about how to take photos to avoid these issues {sigh}. Someday.

So anyway, the not-so-great photos are adding to my lack of motivation. But, trudge on I must. I happened to see this post on Ali Edward's blog of a page she recently did for Hero Arts, and I decided that the layout would work perfectly for the photos I had. I went ahead and pretty much copied the layout to a T, so I could hopefully get over the hump.

So, here's my page for December 9th. There's a lot that I like about it, but one major thing I disike - I stitched the border around the outside of the photos way too far in, and I just hate the placement of it. I wish I could take it off, but unfortunately stitching can't be undone, so I'll learn to live with it :). I do, however, like the zig-zag stitching between the photos and the patterned paper. I made a tag out of polka dot felt I had on hand and added a "Countdown to Christmas" sticker to it, where I circled the number 9.

The journaling around the photos reads:

"I've been craving homemade cinnamon rolls lately so I decided to make Pioneer Woman's cinnamon rolls today. Unfortunately they didn't live up to my expectations because the dough didn't rise like it should have. Guess I'll have to try again!"

Getting that page done did get me over the hump, because I also was able to whip out the page for December 10th last night as well. I just used the back of the page from the 9th, which is patterned paper from Jillibean Soup. This picture was taken at the Widlights at the Zoo (and if I'm being honest, it wasn't taken on the 10th - we went to the zoo back in November when it was a little bit warmer, but I feel like it's part of the holiday celebrations, so it should be included in the album. I didn't have any other photos for the day, so this was a good add-in).

Journaling reads: "Even though this picture of Avery is super blurry, I still thought it was super cute of her with her hot chocolate"

I cut out a portion of the brochure that we had gotten at the zoo that night and added it to the bottom, along with a few felt snowflakes and the Jenni Bowlin bingo card (where I stamped a circle around the number 10). Easy peasy.

Thursday, December 9, 2010

December Daily...December 8th

Today's page took little time at all since I had premade the envelope when I put together the foundation pages for the album. This page is dedicated to Avery's Letter to Santa. I traced "dear Santa" onto the front of the envelope using some chipboard letters from MM. Then I painted with red and green to fill in the letters. After the paint dried I added the faux stitching with white pen around the letters and as a border.

The letter is made up of white cardstock. I added the strip of red cardstock (that I punched with the threading waters border punch), and the green polka dot ribbon at the top, then I stitched across these with red thread. Next I used a few stamps from Art Warehouse, in Cranberry Chalk ink, and then drew lines on the page. Once that was complete Avery and I sat down and she dictated to me what she wanted on her list. My favorite is Girl Toys, "cause I'm a girl" she says.
Then I had her sign her name at the bottom, and took a picture of her doing this and added it to the back of the letter.

And that's it for Day 8!

Wednesday, December 8, 2010

December Daily... December 5th and 6th

Here we are at day #5. We had a pretty lazy day here at the house on Sunday, so I didn't have anything specifically for that day that I wanted to document. Instead I decided to take some photos of the nursery and write down some of the diy projects I accomplished in there. Here is the front page for the 5th. The red cardstock is cut to 6x7" and the photo is a 4x6. I drew the white line around the edge for a border on the cardstock and photo. Then I attached the photo onto a piece of 6x8 patterned paper and folded it so that it could be lifted to reveal some additional photos (which you'll see below).

Inside are 5 pictures cut to 2x2", and then I just wrote a little bit of journaling describing each photo (see closeups below).

And then here is the back of Day 5. I repeated the white border on the cardstock and photo. Kept this pretty simple, not sure if I'll embellish this anymore or not.

And Day 6 is all about Avery's dance class. I decided to change the photos to black and white, so they didn't clash with the rest of the album. I added a little bit of journaling in Photoshop right on the larger picture. The page is 8x8 and the large photo is 4x6, with the smaller photos below being 2x2. I stitched a red border around the block of photos and added some baker's twine between the large and small photos. I stamped the circle and number 6 using Ali Edwards' December Daily stamp set from Technique Tuesday, and cut it so that it is just a half circle. Then I rounded the corners to complete the page. This is probably one of my favorites in the album so far...clean and simple.

The back of this page repeats the layout of the front:

Oh, and I ended up finishing the back of day 1, which I did not have completed at the time I originally posted that page. So, I thought I would show you what I added there. It's an 8x8 photo of Avery kissing my big preggo belly, which I think is just a really cute picture, and appropriate to the theme of day 1, where I wrote about how we are anticipating the birth of kiddo #2. I trimmed the photo to match the front of the page, and then drew a border in white just to add a little something to it. Quick and easy, and I really like how it turned out.

Tuesday, December 7, 2010

December Daily....December 4th

My December Daily page for the 4th uses a baseball card holder sheet, cut down to only utilize four slots. I rounded the edges of all the pictures and patterned paper in each slot. The pictures are all from the Christmas party that we went to at the Corbin's house. Usually, we have the party at our house, but this year I just wasn't up to all the work it entails, and Annalisa very sweetly offered to have it at her house instead. The unicorn that Avery is sitting on has been passed around in our White Elephant gift exchange for many years now at this party. It's the one present all the adults try to avoid receiving, but the kids love it!

I tried to get a closeup shot of the card with the title on it, only because I wrote on it with white ink too, but it's not showing up well in the pictures. You can see it better in real life.
Here's the back. I didn't do much embellishing with this page. I did stamp "favorite traditions" on the bottom left photo, using the December Daily Ali Edwards stamp set from Technique Tuesday.

And that's all for Day 4! I have day 6 complete, but still need to finish up day 5 before I post. Hopefully I can get to that tonight and will be able to post more tomorrow. Thanks for looking!

Sunday, December 5, 2010

December Daily...December 2nd and 3rd

For December 2nd, I decided to scrap whatever foundation page I had previously put together, and just went with a 5 x 7 photo. We started putting up our tree on the 2nd, and this photo is of Abe sitting behind it for quite some time trying to figure out why a strand of lights wasn't working. I added an Ali Edwards Title and Journal Photo Overlay , changing the foreground color to white, and erasing the title and line towards the bottom of the overlay. Then I added "December 2" directly on the photo in Photoshop, at the bottom.

Here's the back. Just a white piece of cardstock. I typed out the journaling in Photoshop, again using an Ali Edwards Title and Journal Photo Overlay. This time I changed the foreground color to red. I used Stickles (Candy Cane Red) to go over the "Today" title at the bottom, and stamped "December 2nd" in red (from the Ali Edwards December Daily stamp set at Technique Tuesday). Pretty simple.
On the 3rd, I again didn't use the foundation page I had already set up, and instead focused on just the photos. I took a scrap piece of cardstock and adhered two 4x6 photos one on top of the other, so the page is 6x8 overall. In photoshop, I added Katie Pertiet's Christmas Cut-Ups (I couldn't find these on the Designer Digitals website anymore, but she has a new holiday version out this year which is similar) to look like ribbon between the two photos (I just added five of the same "December Memories" cut-up directly next to each other to make one long line). I then rounded the edges of the page and stitched a border in red. The canvas star is from Jillibean Soup and the number 3 is from Creative Imaginations.

On the back I repeated the "December Memories" cut-ups at the bottom of the photo, and then added the patterned paper below to write my journaling (PP is from Basic Grey).

And that's it!

Wednesday, December 1, 2010

December Daily...December 1st

And so it begins! Here is my first page in the December Daily album. On the left is the backside of the album cover. I'm feeling like that needs a little something added to it, but we'll see if I end up doing anything there.

I freehanded the outline of this page, and cut it out in black felt. Then I stitched a border around the edge with red thread.
I added some hidden journaling by using a long strip of patterned paper, with white cardstock inside where I typed out and printed my journaling. I added two buttons to the patterned paper before adhering it to the cardstock, so that I could wrap baker's twine around them to hold the top and bottom together.

Inside is a bit of a reflection on how much we have been anticipating this month due to the upcoming birth of our little boy, and my feelings and expectations about it all. I also added one of the ultrasound pictures to the bottom of the journaling page (which I scanned in and added in Photoshop).
So far I haven't added anything to the back of this page, although I have a couple of ideas. More tomorrow...hopefully.


2 Weeks? Aaaaaaah!!!

For those who have requested a recent picture of the baby bump, this one was taken on Thanksgiving:

I went to the doctor on Monday for my 36 week checkup. He made the comment that we could be having this baby in three weeks, if all goes well, to avoid being in the hospital on Christmas day (which we would like to do). He's talking about possibly inducing on the 16th or 17th. But when I looked at the calendar after he left the room, that's really more like 2 1/2 weeks (and now it's pretty close to just 2 weeks). That piece of information sort of hit me like a ton of bricks. It's not that I haven't been looking at the calendar, because I have. But I guess since we weren't even in the month of December yet, and my due date is the 25th, it felt like I still had a month. Well, not anymore! I still have lots to do, not necessarily to prepare for the baby, because most of that is done, but mostly to prepare for Christmas. If none of it got done, it would be fine, we would just figure it out later, but that doesn't change my new-found sense of urgency to get some things crossed off my list!

At the appointment the doctor checked me and I am only 50% effaced and not dilated at all (but the baby is head down, so that's good). He said my cervix needs to catch up in order to even do the induction when he's talking about doing it. So it's possible the baby's birth date could be a little later than currently anticipated I guess, if my cervix doesn't cooperate. We'll just have to wait and see!

Tuesday, November 23, 2010

December Daily 2010

As the end of the year is fast approaching, I've decided to once again participate in Ali Edward's December Daily project . December is probably my favorite month of the year, and this year in particular will be a momentous one for our family, since I am due on the 25th with our second child. I know that I'll want to have all the memories leading up to the birth documented, as well as that first week or so after he's born. While it will be an extremely busy and hectic time, making it hard to complete the album, it will be so worth it if I actually do finish it.

I have started working on the foundation pages for the album, but haven't finished them completely yet. I have about 7 days missing, but I'm not sure if I'll actually add anything in prior to December for those missing pages, since I know I'll probably do a few all digital pages, which will take up those slots. I also haven't put numbers on any of the pages, since I know these will change once I get into completing the book. For that reason, I'm not going to photograph the inner pages right now. They're very basic and not interesting enough to warrant all the time to photograph and add them to the post. They'll be very similar to last year's album ... a mix of transparent sheets, envelopes, patterned paper and baseball card sheets etc.

I did take a picture of the front cover though:
I'm using two sheets of an acrylic album as my front and back cover. Under this is an 8x8 piece of Bazzill glazed cardstock , which has tone on tone white polka dots (you can see these a little better in the picture below). I stamped "december" and "20ten" with versamark ink and then heat embossed them in red (stamps are from Technique Tuesday, Ali Edward's December Daily set ). Then I added the "2" and "5" chipboard numbers, which I painted in red first, then added Glossy Accents and Martha Stewart clear microbeads on top of that. The canvas star is from Jillibean Soup, and I think the "days" stickers are from Making Memories.
This is a little closeup of the "25" so you can see the clear microbeads. They add some fun texture to the numbers, and I like the way they turned out.
So anyway, that's my front cover. I'm hoping to keep up with the album as much as possible during the month and post the completed pages, just like I did last year. I guess it all depends on when this baby decides to join us, and how chaotic life turns out to be once he's here!

Tuesday, November 9, 2010

Cupcake Pops

Abe turned 35 over the weekend. I wanted to make him a cake to celebrate, but he doesn't have much of a sweet tooth, so I knew if I made an entire cake it would go mostly uneaten (or alternatively, I would end up eating the majority of it). So, I decided these little cupcake pops would be the perfect solution. I only used 1/4 of a 13x9 cake, and froze the rest so I can make more cake pops for another occasion. It was just the right amount for a birthday treat, without having tons left over.

I got the idea and recipe for these from the Bakerella website, and just recently bought her new cookbook , which has tons of cute ideas for other types of cake pops that you can make. There's definitely a learning curve when making these. This was my first attempt, and the candy melts I used for the coating were a little thick. I tried thinning it with vegetable oil, as she suggests, but it didn't seem to help much. I'll have to try one of the other recommendations next time. I couldn't seem to get the top and bottom colors to meet in the middle very well, so on most of these there is some cake showing, which you're not really supposed to have.
But, even with their imperfections I thought they were still pretty cute, and best of all they tasted really good. Avery mostly liked the candy coating and left the cake part for us to finish off.
And here's just a goofy shot of Abe and Avery showing how much they enjoy their cake pops:

Tuesday, November 2, 2010

Some pretty cloths for my baby to vomit on :)

Lots of kids grow attached to their blankies, and Avery is no different. Although, well, maybe a little different, in that she didn't get attached to a blankie but is instead attached to her burp cloths. She calls them her blankies, though. These are the burp cloths that we have been using since she was born, which are just the basic white cloth diapers that are found at any baby store. It has actually been a blessing that this is what she became attached to, because they aren't one of a kind, and can easily be replaced if we should ever lose them all.

The other day, when we were discussing the upcoming arrival of the newest member of our family, Avery said to me in a very sad voice, "the baby is going to take my blankies." So...I knew I would have to come up with an alternative burp cloth for child #2, so as not to have a constant battle with Avery over which were her blankies vs. her brother's burp cloths.

As luck would have it, I happened to come across this easy tutorial for sewing burp cloths on the Jones Design Company blog. And I thought, well heck, why not just make my own? It seemed easy enough.

So I started sewing.
I used some fabric that I had on hand (the blue floral from the baby's room, and the red plaid that I've had forever), and then I bought a couple 1/2 yards of fabric at Jo Ann's.
This one is made of linen on one side...
and a very soft jersey knit on the other (all of the burp cloths have the jersey knit on one side). The tutorial called for using a terry cloth or a chenille for the soft side, but the terry cloth I found at the store just wasn't all that soft, and I was afraid the chenille would be difficult to sew. This fabric was super soft and I figured would be easy to sew (which turned out to be true). I replicated the double-stitched border that was shown on the tutorial. I thought it made them just a little more interesting.These were super easy to make, and I was able to get 9 finished before running out of fabric. I'll probably make a few more after making another run to Jo Ann's. If I remember correctly, you can never have too many burp cloths.
I think they turned out pretty cute, and best of all, Avery's happy that her blankies are now safe and sound.

Monday, November 1, 2010

Halloween + Nursery Progress

Hope everyone had a great Halloween. Ours was good, although after dressing Avery up five different times, I can definitely say I'm over it at this point! Thank goodness it was an easy costume (she was Tinkerbell) that didn't take much effort to put on, with no makeup or special hair-do's required. Here are a few pics from our Halloween events:

Avery with her cousins at my sister's house (plus some of her cousin's cousins). It was a great day for a party - nice and warm, and the kids had fun playing the games that my sister planned for them and of course loved all the Halloween treats. I forgot Avery's wings that day:
Avery at school with Abe. We were invited to the school for a Halloween parade and party afterwards. I didn't get many good pictures here. This is just a shot of her during snack time (her favorite part of the school day):
Trick-or-treating with friends on Thursday in Dublin. We added lots more layers under the costume, along with gloves, since it was pretty chilly that night. Avery really got into running door to door and getting candy.

More trick-or-treating. Our neighborhood held "beggar's night" last night, on Halloween. Again, it was pretty cold out, so we just made a loop around the neighborhood and Avery told us she was cold so we went back in after about an hour. When we made it back to the house, I checked the huge bowl of candy that we left on the porch for the trick-or-treaters, and it was all gone! After an hour! I think some kids must have been taking handfuls. I don't blame them...it was good candy :) I was hoping to have some left over for my pregnancy cravings, but no such luck. Guess I'll be raiding Avery's pumpkin.
Speaking of Avery's candy, she asks for candy now about thirty times a day. What do you want for breakfast? Her response, "Umm......CANDY?" What do you want for lunch? "Umm.....CANDY?" What do you want for dinner? You get the idea.
And on to other topics...we're moving along slowly on the nursery. The curtains are done, with exception to being hemmed (have to hang them first and will pin the hem once they're hung, so I can get the right length). Right now we're in the middle of painting. First coat is done, just need to get a second coat on the walls and hopefully that's enough. Then we can start moving things into place and I can post some pictures. I also worked on sewing something else for the baby that I'll post about later this week probably, so stay tuned!